 Skip to content
Vortex parasol installation can be a daunting task, especially if you’re new to the process. Are you looking to create a stylish and comfortable outdoor space for your home or business? A vortex parasol can be an excellent addition to any outdoor area. Not only does it provide protection from the sun and rain, but it also adds a touch of elegance and sophistication to your outdoor décor.
In this guide, we’ll take you through the step-by-step process of installing a vortex parasol, ensuring that you have all the information you need to do it right the first time.
What is a Vortex Parasol?
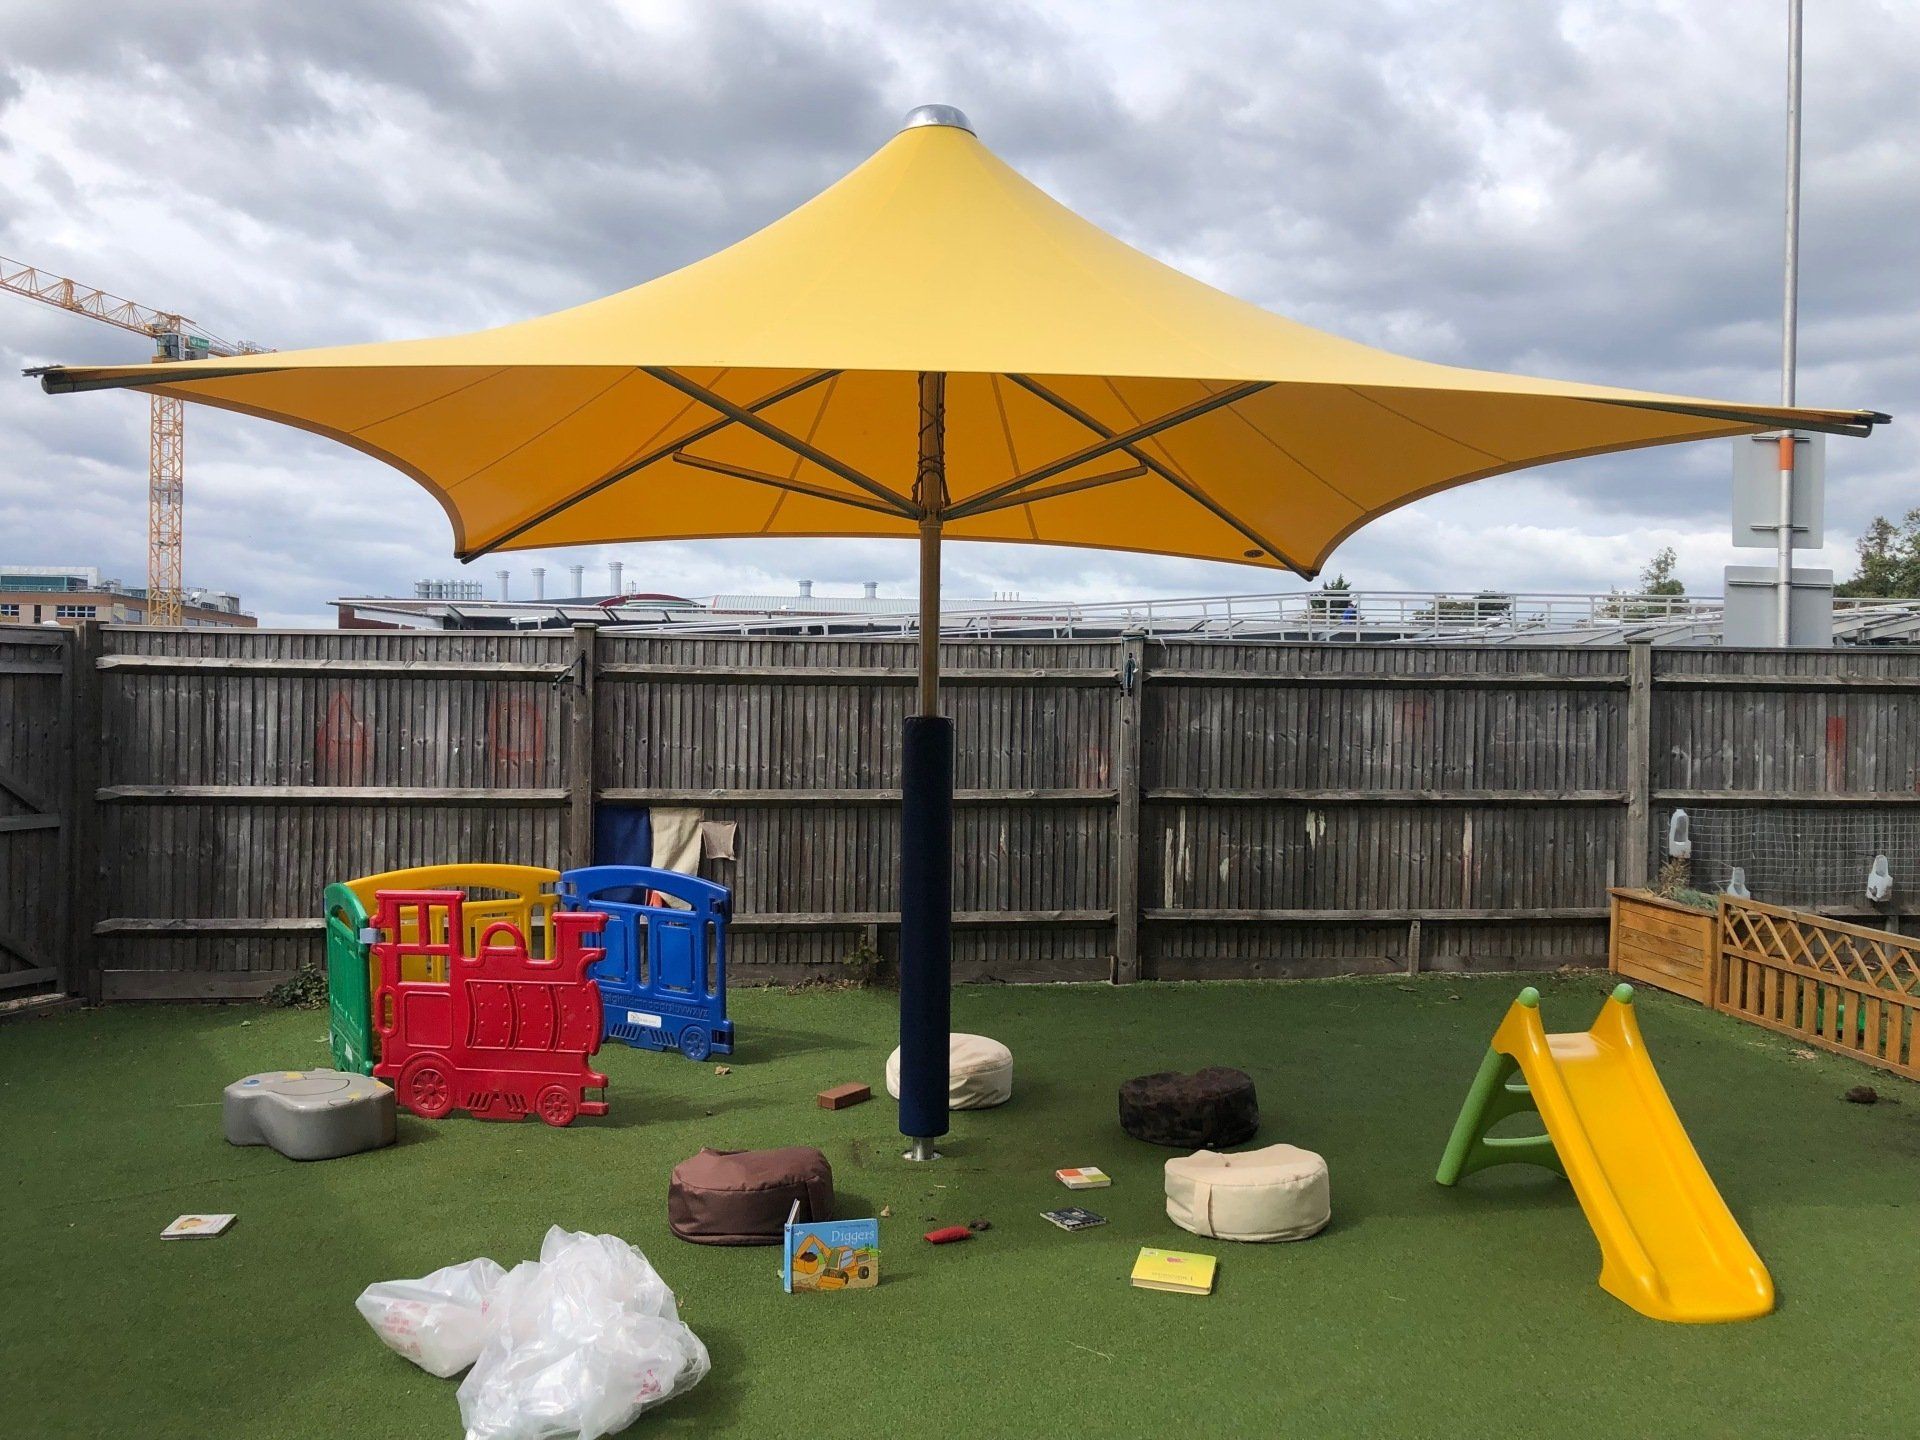
Before we get into the installation process, let’s take a closer look at what a vortex parasol is. A vortex parasol is a large, round, or square-shaped parasol that features a unique design that allows it to withstand high winds and other weather conditions. It is constructed with a double-layered canopy that provides excellent protection from the sun’s harmful rays.
One of the main benefits of a vortex parasol is that it can be easily adjusted to meet your needs. It can be tilted to block the sun’s rays from any angle, and it can be rotated 360 degrees to provide shade in any direction. Additionally, a vortex parasol can be easily opened and closed, making it an excellent choice for any outdoor space.
Tools Required for Vortex Parasol Installation
Before you begin the installation process, it’s important to ensure that you have all the necessary tools. Here are the tools you’ll need to install a vortex parasol:
- A wrench
- A power drill
- A measuring tape
- A ladder
- A screwdriver
- A level
Step-by-Step Guide to Vortex Parasol Installation
Now that you have all the tools you need, let’s get started with the installation process. Here’s a step-by-step guide to installing a vortex parasol:
Step 1: Choose the Location
The first step in installing a vortex parasol is to choose the location. It’s essential to choose a location that is level, stable, and provides adequate space for the parasol. Make sure to consider any obstructions, such as trees or buildings, that could interfere with the installation process.
Step 2: Install the Base Plate
Once you’ve chosen the location, it’s time to install the base plate. Start by attaching the base plate to the ground using the screws provided. Use a level to ensure that the base plate is level and stable.
Step 3: Attach the Pole to the Base
Next, attach the pole to the base plate. Start by inserting the pole into the base plate and tightening it with the wrench. Use a level to ensure that the pole is straight and stable.
Step 4: Install the Arms
Now it’s time to install the arms. Start by attaching the arms to the pole using the screws provided. Make sure to tighten the screws securely.
Step 5: Install the Canopy
Once the arms are in place, it’s time to install the canopy. Start by laying the canopy over the arms, making sure that it is centered and level. Use the power drill to attach the canopy to the arms.
Step 6: Adjust the Tilt and Rotation
Finally, adjust the tilt and rotation of the vortex parasol to meet your needs. Use the handle to tilt the parasol to block the sun’s rays from any angle, and use the rotation mechanism to provide shade in any direction.
FAQs About Vortex Parasol Installation
- Do I need any special skills to install a vortex parasol?
No, you don’t need any special skills to install a vortex parasol. However, it’s essential to have the necessary tools and follow the installation instructions carefully.
- Can I install a vortex parasol on my own, or do I need professional help?
You can install a vortex parasol on your own, but it’s always a good idea to have a second person help you. It can be challenging to hold the parasol in place while you tighten the screws, so having someone to assist you can make the process much easier.
- How long does it take to install a vortex parasol?
The installation process can take anywhere from 1-2 hours, depending on your level of experience and the tools you have on hand.
- Can I install a vortex parasol on any surface?
The base plate of the vortex parasol should be installed on a level and stable surface. It can be installed on concrete, wood, or other surfaces as long as they are level and stable.
- Can I leave the vortex parasol outside during the winter months?
It’s recommended that you store the vortex parasol inside during the winter months to protect it from harsh weather conditions. If you do leave it outside, make sure to cover it with a protective cover.
Conclusion
Installing a vortex parasol can be a great way to add style and sophistication to your outdoor space while providing protection from the sun and rain. Perry’s Shades are highly skilled at Vortex Parasol Installation, so if you’d rather leave it to the pro’s, contact us now for a free no-obligation quote.
Written by Richard Perry – Founder of Perry’s Shades
Richard Perry is an expert in the field of sun sail shade installation and Vortex parasol installation for both commercial and residential properties. With years of experience in the industry, he has provided countless clients with exceptional service and top-quality products.
Richard’s passion for his work is evident in the positive feedback he receives from his clients, who are always satisfied with the end results. He takes pride in ensuring that each project is completed with the utmost care and attention to detail, and he goes above and beyond to make sure that every client is completely happy with the finished product.